My adventures in pregnancy, motherhood and beyond

Please enjoy the musings and updates and leave me a comment if you'd like!
Showing posts with label Recipes. Show all posts

Thursday, March 13, 2014

Recipe Review

This will just be a quick review of some of the new recipes we've tried lately. We had great success with the Irish stew and bread of the last post, but the other new recipes need some modification. I'm withholding judgment until I can try the modifications I have in mind. If you try any of the recipes, please let me know how it went, and whether you tried with or without modifications!

The first recipe we tried was the artichoke tomato pasta, which can be found on Better Homes & Gardens website here. It ended up being a very liquid-y sauce, falling past the pasta to the bottom. We used fettuccine, and I had to use white onion instead of sweet onion since I forgot to pick up a sweet onion at the store. The first instruction says to mix Parmesan cheese and the reserved pasta water into the drained pasta; this made a horrible mess and didn't work at all, so I would definitely skip this step and just sprinkle the cheese on top before serving. I think if you use a 14.5 ox can of pureed tomatoes/tomato sauce and a 14.5 oz can of drained diced tomatoes instead of the crushed/diced tomatoes, it would make a thicker sauce that better coats the pasta, but still give you the tomato chunks of the original. The flavour was really good though, and even James, who doesn't like artichokes much, agreed it was a good recipe, though the limp sauce was a bit of a let-down. I can't wait to try the modifications.

Next up is a recipe from an advertisement for McCormick spices. You can find it online here (their website has a neat tool where you can adjust the serving size and it'll edit the recipe!! So cool!) This one had a lot of potential, but despite all the seasonings, it just ended up kind of bland. I think if you added salt and pepper to the flour mixture (or directly to the chicken prior to flouring) and to the sauce, it would end up much more flavourful. We didn't use the brand names, sticking with what we had at home and getting rosemary from an off-brand at the store for much less than McCormick's. I also only use Swanson's reduced sodium chicken broth. I've tried a few different chicken broths, and the flavour just isn't right to me, so I stick with what I know works. We ended up with a large sauce to chicken ratio, and I think we should've used a few more chicken tenders, but you could also always chop up the chicken and add it as an ingredient of the sauce over the pasta. If you can kick up the flavour a bit, this would be a great dish; as it is it's just a bit bland. If the salt and pepper doesn't work, I'm binning the recipe.

A few nights ago we tried grilled chicken with lemon-cucumber relish. This is another Better Homes & Gardens recipe, here, which my mom gave me a subscription to. We've found some great recipes through it, and I always look forward to flipping through it (it's also where I found the paint colours on our walls). There were a few thing about this recipe. The first was user error. I mixed together the relish and yogurt sauce because pregnancy brain. It still ended up ok, but in my attempt to make it more like the picture (before realizing my mistake) it ended up a bit thinner than expected. However, it still worked out fine, though next time I'll mix them separately and properly. I left out the lemon peel since I just use RealLemon for juice. I would also season the chicken differently. I'm not a huge fan of the cumin flavour, which is really prevalent in this recipe. It's ok, but definitely not to my or James' tastes. James pointed out that the chicken could really be quite versatile in this recipe, from plain grilling to lemon-pepper topped (<--this one!!) I definitely think if you season the chicken differently and properly mix the toppings, this would be a phenomenal dish. 

We made the side dish or sweet potato wedges. I've had this recipe for ages; my mom clipped it from the newspaper and sent it to me years ago (seriously, the newspaper is yellow). I found the same recipe here on Martha Stewart's website. These were FANTASTIC!!! Why did I wait so long to make these? James thinks I exaggerate, but he's never been pregnant, so he doesn't understand satisfying a craving you didn't even know you had. I think I hate 3/4 of them, only stopping when I was so full I physically couldn't take another bite; there were two half wedges left out of 32. I mixed the potatoes and seasonings in a gallon sized ziploc bag, shaking it until well-coated. I cooked them for the full 20 minutes and they were so soft, but still sturdy enough to dip (ranch, a tiny bit). So so so so so good. 

Wednesday, March 12, 2014

St. Patrick's Day Menu

I love having dinner guests. I love cooking for other people. I might go a little crazy sometimes; my first Thanksgiving had a giant turkey and probably 6 or 7 sides, plus 2 desserts. When we knew we were having dinner guests, I decided to try some of the recipes from my to-try binder. I just realized it would make the perfect St. Patrick's Day menu.

The stew recipe I used can be found on Irish American Mom, an Irish woman living in Kentucky, who shares Irish recipes using American ingredients. I had a little bit of trouble with some of the ingredients: frozen pearl onions and bittersweet chocolate chips aren't easy to find here (the clerk tried to tell me semi-sweet was the same thing.) But eventually, I found all the ingredients. I won't go through the whole recipe here since she has a really thorough tutorial with photos. I'll just tell you some of the differences:
  • I took the instruction to julienne the parsnips to heart, so mine ended up as shoestrings. Still good though
  • I would cut the potatoes smaller to ensure that they soften enough
  • Instead of using a bowl/plate to dredge the beef, I put the flour, salt and pepper into a gallon size ziploc bag, added the beef and shook to coat it
  • Between no prep the night before, dropping G off daycare and an emergency run to buy a larger crock pot, I had barely 6 hours to cook the stew instead of twelve. It was on high for 3 hours, then low for 2, then high again for the rest of the time
  • I had a slight panic attack because the stew tasted off when I tried it after combining all the ingredients. I was sure I had doomed our guests to an inedible meal and emergency delivery pizza. Luckily, by the time it had cooked, the flavours were rich and perfect. 
  • I don't like the taste of Guinness, but it was great in the stew. I used the extra stout bottle. Don't bother measuring out 1.25 C, just dump in the bottle; the head makes it impossible to measure.

I would highly recommend this recipe and will definitely make it again. The beef was fork tender, the veggies were soft and it was nice and filling. The leftovers are freezable and even the weather cooperated: nothing like a rainy night for warm stew.

As some of you know, I'm horrible at making sides, but what goes better with stew than bread? Since returning to the States, I've missed Irish bread so much, and this seemed a good opportunity to finally get over my hesitation and bake my first loaf of bread! Irish American Mom has a recipe for brown bread, but I didn't want to have to buy whole wheat flour, pastry flour, wheat germ, etc, so I searched for a soda bread recipe and found one from a Southern food website, of all places. But it used all purpose flour, and I had everything but the buttermilk and cream of tartar. You guys, this was SO easy! Why have I never made bread before?? It took half an hour to prep, less than an hour to cook and made the house smell delicious, as well as tasting delicious. The recipe is pretty self explanatory. The only thing I'd recommend is after melting the butter, stick it in the fridge, mix in the buttermilk first, then mix in the butter, otherwise you'll end up with little clumps of flour that don't incorporate. This happened to the first batch of dough I made and it was horrible, but the second batch was perfect. It was soft on the inside, crusty on the outside, warm and tasty. It also had the added benefit of making the house smell great. It's not sandwich bread, but it is delicious and the perfect accompaniment to the stew.


Again, if you make any of these, let me know how it goes and if you enjoyed it! Happy cooking!

Thursday, February 20, 2014

Lentil Soup

Is there anything as amazingly comforting as soup? The correct answer is NO.

Anyone who knows me will tell you I'm a soup freak! It can be 90 degrees outside and I'll be curled up in a blanket with soup. Ramen is one of my favourites, but I have a pretty wide repertoire for soup. Greek avgolemano, shrimp bisque, shrimp and corn chowder, egg drop, I love them all! I bought some lentils to try to make my own lentil soup, and the weather has been cooperating by being chilly. James was going out of town for the weekend, and  figured it was the perfect time to try the recipe that was full of some of his not-so-favourite foods. My mom sent me the recipe below, with some of the modifications she had made to it. I made some further modifications and ended up with a soup that G ate two bowls of!

Instead of the porcini and portobello mushroom, I just chopped up 8 oz of regular white button mushrooms and added them in step two. The microwave thing was weird to me but it worked really well. I left my carrots pretty chunky since I just cut up baby carrots. G liked that, but I think I'd have preferred them more minced. Instead of fishing out the bacon after cooking, I crumbled  up the 4 slices of bacon and left them in. I also don't like Swiss chard, so I substituted frozen, chopped spinach instead, and I think it turned out great. I didn't add any salt or pepper, and didn't serve it with oil, but I did top it with parmesan.

One thing I did notice was that with all the stuff in the crockpot, it was almost overflowing, and since I was cooking it on high, it spilled a little and ended up hissing a bit. The dogs thought some creature had gotten into the house and I was wondering if there was a squirrel in the stove vent somehow (you never know here!) Eve after the lentils had absorbed a lot of the liquid, there was still a full crockpot left. We'll have delicious leftovers for a while, and I'm planning on freezing some of it for another week.


If you try it, let me know how it goes! So here's the original, from Slow Cooker Revolution:

Monday, August 20, 2012

Smoky Corn Chowder

Smoky Chowder
Soup. Mmmm. I LOVE soup. Especially chowder. I've never actually had the guts to make a chowder before, but I found a recipe via Pinterest that was looked too good to pass up.

We used this recipe from Bev Cooks. It looked so good.

We did some things differently, and it probably made it taste a bit differently. Instead of using fresh shrimp, we used frozen shrimp from Fresh and Easy. It's not James' favourite thing, seafood snob that he is, but it's better than having to devein and deshell the supposedly "fresh" shrimp from the meat counter. And, no, if they're real shrimp (not prawns), they've been frozen in order to be transported. (See what you learn when you marry a seafood snob?) We also chopped up the shrimp to mix into the soup instead of searing them and putting them on top. And, what can I say, we're super lazy, so we used bacon bits isntead of cooking out own bacon. This one actually has a real reason--buying a pack of bacon and only using 2-3 strips means the rest generally goes to waste, so it's better for our purposes to use the bits.

We followed the other instructions pretty much word for word. I didn't notice the differences between her version and the Real Simple version, but I just skipped the steps cooking the bacon and shrimp. Instead, I just added some oil to the pot (and I could have used a much smaller pot.) I sauteed the minced up yellow onion for 5 minutes. Since the recipe only calls for half a yellow onion, I saved the other half and froze it to use later. This is going to become a habit, I think. When I need things I don't usually use and have to buy too much, I'll freeze the rest and save it to use later.

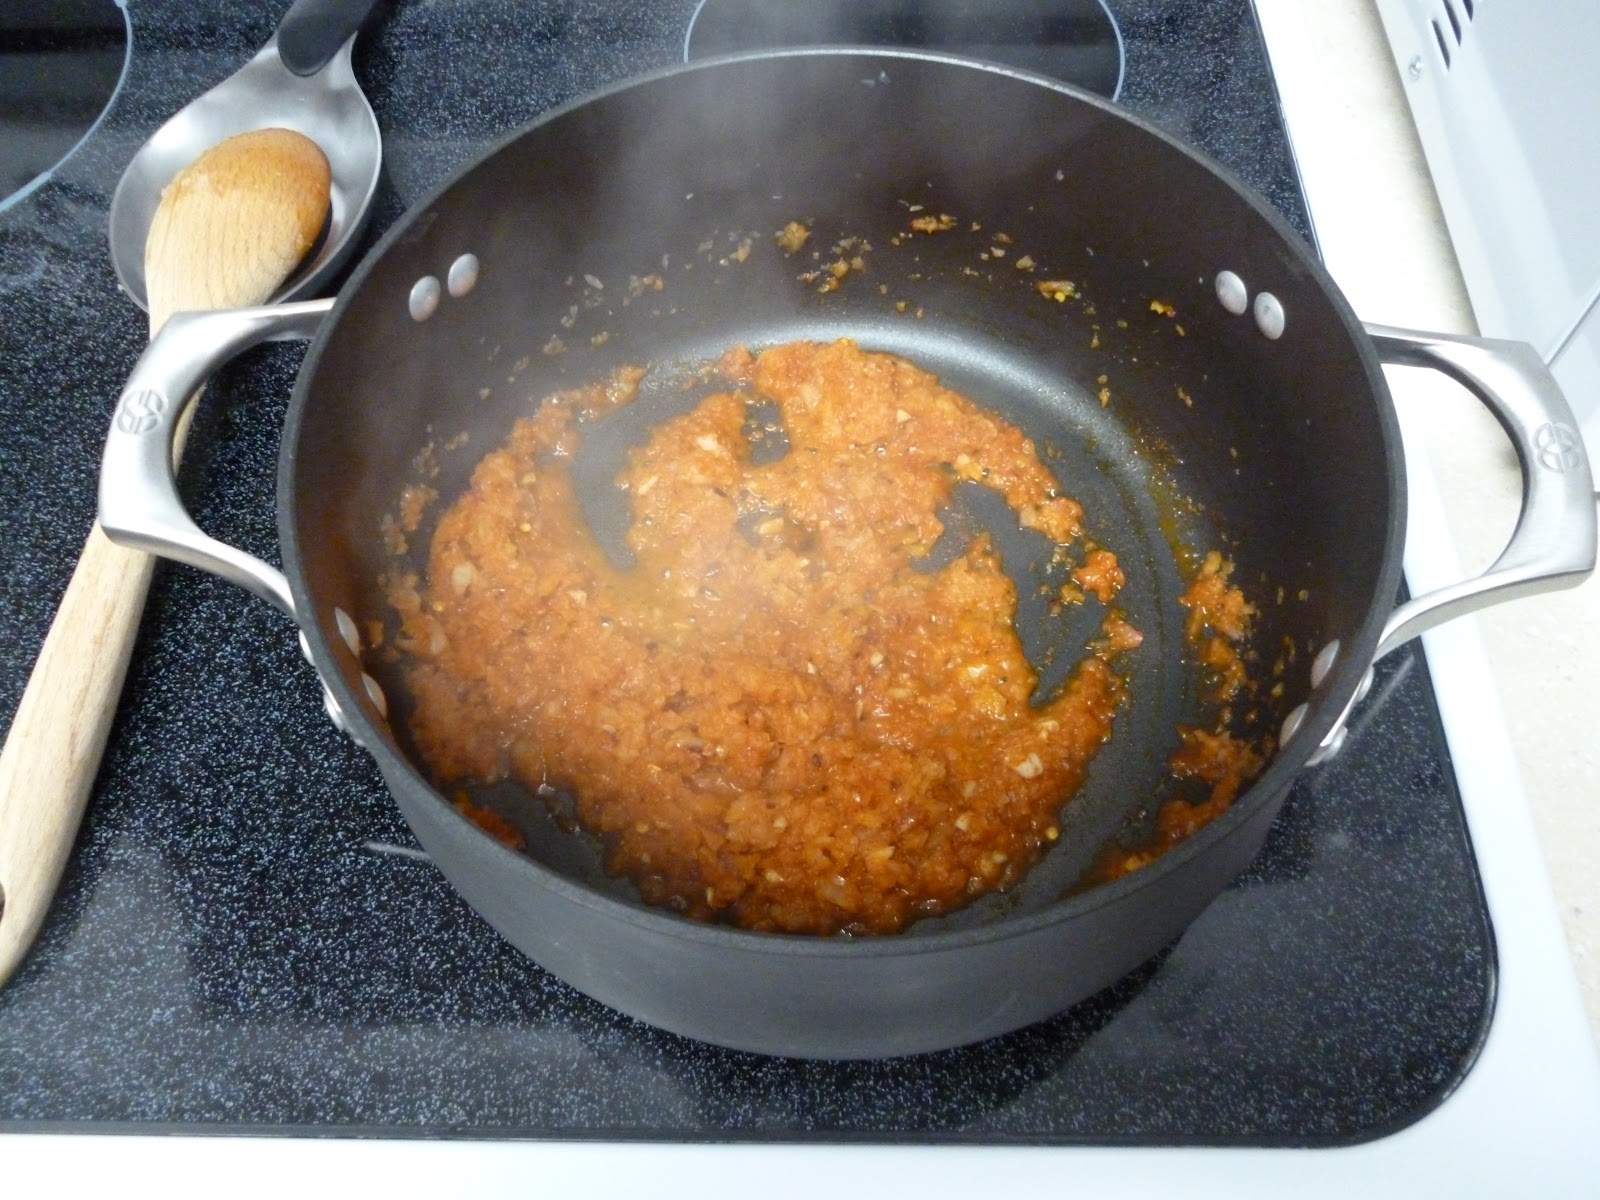
Onions and spices sautéing. Note the steam
After the onion was done sautéing (mind you, mincing the onion in the food processor is easy and makes the texture nicer, but does add a lot of liquid, which makes it harder to sauté the way I'd hope to), I added the paprika, the garlic, salt, pepper and crushed red pepper, sautéing it for another minute or so. The paprika seems to soak up the extra liquid. James cut off the corn kernels from the cob, and I added them to the mixture, sautéing for another minute or two. Instead of using chicken stock, I used the reduced sodium chicken broth, and we used half and half instead of cream to keep it a (little) healthier. After tasting it, I realized it did need some more salt and pepper.

Add the corn and mix well
It took forever to get it up to a simmer, but I did manage to get it there finally. Of course, I had to bring it to a boil first. Either way, it took a lot longer than the recommended 15 minutes, but I figured heating it up and cooking it could only add to the flavour in the long run. This is also were a smaller pot would have been handy, since our stove is horrible, and the larger pots only boil in the very center. I used the immersion blender to blend most of the chunks out (another small pot is better instance, since it was very shallow and splattered.) I'd say I blended a little more than half, but didn't pulse it completely smooth. I added some bacon bits and the half pound of cut up shrimp and allowed the soup to heat through for another minute or two.

Cream and broth added
James didn't want anything other than some parmesan on his soup. I added some extra bacon, extra crushed red pepper and parmesan on mine. It was creamy, but not really smooth--the blended chunky parts kinda stood out from liquid parts, but it was still absolutely delicious. I loved how despite it being hot and a bit spicy from the peppers, it was still light and refreshing. It was the perfect summer soup. The recipe made enough for 4 servings, and since I had seconds, we have one serving left over for lunch one day. I think it should reheat just fine, and I'd love to see what it tastes like with a bit of hot sauce added in. (Ok, yes I'm completely obsessed with that hot sauce, but it's just SO good! On everything!) This recipe would also be very easy to adapt to vegetarian; just leave out the bacon and shrimp and use vegetable stock instead of chicken stock. This is definitely going to become one of our staples. The more soup recipes in my cooking arsenal, the happier I'll be :) (I really do LOVE soup). So, go out and make yourself some corn chowder!! It's so good! You won't regret it.
And the finished product!

Wednesday, May 9, 2012

Fails-Kitchen and DIY

Some fails. Don't worry, the last one has a happy ending.

I love buffalo chicken ANYthing. I think my love affair began with a buffalo chicken dip one of James' relatives brought to a party. I could have eaten nothing but that all night and been perfectly happy. Since then, I've been accumulating buffalo chicken recipes to try. I don't make it often since Hubby isn't a spicy-foods lover, but he relented and let me try a buffalo chicken mac'n'cheese recipe I found. I don't want to link to the recipe since I'm pretty sure the result was due to faulty ingredients.

The first thing you have to understand is that I never had Kraft mac n cheese until I was 13. My mom always made macaroni and cheese that was more like a casserole. She made it the way my grandma made it, and my grandma made it the way Papa's mom had made it. Cook the noodles, mix with some cheddar and bake in a casserole dish. If you're Papa, dad or me, add A1 (or HP) sauce and enjoy. Yum. This is one of my top comfort foods, placing second only to schnitzel. And now I lost my train of thought and want macaroni and cheese....where was I? Oh yeah, James doesn't fancy this dish as much as I do. He prefers a saucier dish, which I usually do too, so we've had to compromised and I've learned to accept (and maybe even like) Kraft mac'n'cheese and hotdog nights.

We halved everything since it was just the two of us, and it still made enough leftovers for at least another meal. There were some things I would have changed: it smelled delicious while cooking, but didn't have much spice or buffalo flavour, so I would probably double the sauce (and kill James, according to him). We also definitely skimped on the chicken, but I hadn't realized we only had one chicken breast left when we started cooking at 8:30, and didn't feel like running to the store. I left out the panko because I really don't understand that topping for mac'n'cheese, and had to leave out the blue cheese for obvious reasons :( It ended up alright, but it was mediocre at best. I also burned the butter when trying to make part of the sauce, so that probably didn't help.

The problem was the reaction we both had. My stomach ache yanked me out of a pleasant dream the next morning. Hubby said he thought he was dying in the shower. I thought it was just my tummy, since my digestive system is finicky at the best of times. I've just learned to accept that and deal with it, but James tends to have a cast iron stomach. I went over the recipe again, trying to see if it was something in it. If it had just been me, I would have assumed that I should have taken a lactaid, but there was nothing in there that should have bugged us; I'm relatively sure something was up with one of our ingredients or we did something incorrectly/undercooked something. It's unfortunate since the dish had some great potential. If you have a recipe for buffalo chicken mac'n'cheese that you've tried, please pass it along, because it still sounds delicious to me...though it might take James a bit longer to warm up to the idea of trying it again.

My DIY fail was spectacular. And no, there are no pictures. I read this blog post on Delighted Momma and was thrilled. Those of you who know me know that I have digestive issues; I've been to many doctors, had every procedure short of invasive surgery, and no one can figure out what is going on with my stomach. My symptoms match Crohn's, but no one can confirm it since no doctor has been able to see visual signs of inflammation. And my body decides to be normal when I'm having tests done. And since going off birth control last July, my skin seems to have reverted to the middle school complexion I never had. I can control it with benzoyl peroxide, but was told it wasn't safe during pregnancy. I figured I'd give this home remedy a whirl. After all, it can't hurt, right?

Wrong. I haven't had the guts to drink it as recommended, so I can't comment on the digestive properties Delighted Momma claims. I did find some organic, unfiltered (but not raw) apple cider vinegar at Trader Joe's and figured it should work as well. I was cleaning up the bathroom, so decided to sponge the vinegar on my face and set the timer for 20 minutes. My face felt a little flushed, but I wasn't concerned since that's par for the course right now. James came home 5 minutes later and I apologized for smelling like vinegar, but he asked what had happened to my face. I checked the mirror, and my face had turned BRIGHT RED. Worse than the worst sunburn I ever had. And it followed the line of where I put the vinegar, so around my eyes was still super pale. I looked like a bad tanning bed experiment. It was terrible. I immediately washed my face with cold water, but it didn't seem to help. My face had felt flushed, but not burning, not anything that would have suggested this level of reaction. I sponged some milk on my face, and that helped cool my face, but I'm not sure it had any reaction on the redness. I would have used yogurt, but I only had peach yogurt, and I didn't really want to experiment further that day. Within 20 minutes, my face was almost back to normal. I reread the post, and followed a link at the bottom about using the vinegar topically, and sure enough the mistake was my own. You're supposed to dilute the vinegar, 1 part to 3 parts water. I also decided I would find the exact brand in her picture (available at Fresh & Easy) just in case the non-raw thing had something to do with it.

I made up a batch and have been using it 1-2 times daily on my face and chest and it has definitely made a difference! My skin is softer, and my breakouts are fading and less red. I don't know if it's the vinegar, but I think it is. (I skipped a few days and noticed a change again--not for the better). All I know is that that one bottle will last me quite a while and I will continue using it. I'd rather use a home remedy like this than medications, pregnant or not. I would definitely recommend this for someone who has mild/moderate breakouts, but I would stress diluting it!! (Of course, my skin tends to be super sensitive, so *shrug*)

See, I told you one of my fails had a happy ending! And remember, if you have any buffalo chicken recipes, please share them with me! Or any recipe, really. I can't wait to cook more!

Wednesday, June 15, 2011

Crafty

Sorry about being gone for so long again. I always want to wait til I have something interesting to report, but then I get busy and come home tired and just want to relax. So I'm finally making myself write this post. A lot has been going on lately: I started a knitting club, I'm learning to sew, I've been upping my jewelry-making and I'm just loving my volunteer work with the animal shelter.

The knitting club is great! We only have a handful of members, but we meet once a week at St. Peter's Church in Del Mar, at 6 pm on Wednesdays. All levels are welcome; I've even taught someone to knit! Yay! It gives me a nice uninterrupted hour in which I work on my knitting, and will force me to finish projects. It also allows me to ask for help for things I don't understand, which means I can move beyond rectangles and squares. How exciting! Once a month we'll watch a movie while we knit. If you're in the area and interested in joining, just shoot me an email or stop by on Wednesdays.


My new dress, which I wore to work yesterday!
Cute shirt, if I say so myself.
Fabric yoyos + buttons = cute & fun
Learning to sew is not easy. First my sewing machine didn't work, so I got it fixed at a local shop. Then it unthreaded itself and I ran out before I could check on how to thread it, so it wouldn't work again. So I brought three projects up to my mom's place for a 36 hour trip and she helped me finish two of them! I made a denim tote (to which I am adding handles soon) and a mail sorter out of placemats from Ikea. It looks pretty neat I must say. And adding in a bar from a hangar was an absolutely inspired idea from my mom. Then we got to work on my sorority tshirt blanket. It's not going to be a quilt, but mom has all the fabric and helped me figure out exactly how it was going to work. We got through the hardest part (so she said) and when I visit again, we'll work on the next part of it. I'm so excited! I've also been making some fabric yoyos (which I've used on a shirt and to make some pins) and I found some great pre-smocked fabric at JoAnn's and made a dress out of it, easy peasy.

Ribbon pearl necklace

Wrap bracelet, pre-lace
Rosette necklace
My jewelry making has also been going well. I received my first order last Sunday, to make a necklace like my pearl and ribbon necklace for a parishioner's daughter-in-law. I also used the glass pearls to make a neat wrap bracelet, and even thought it's not pictured, I used some flexi lace hem tape to wrap around to make it all lace-y. It's a nice dusty purple colour now. And of course, they rosette necklaces are still available. There is an orange, pink and yellow on for sale in the shop, as well as one that is a bit like a bib and would look super cute with the right neckline. I'm making one that's black and white with a red center bead for a friend, and I'm using smaller rick rack, so we'll see how that goes. But making jewelry is definitely something fun for me to do when I get home and on the weekends.


Now for one cooking item: The best enchilada recipe I have been able to find is from Campbell's Kitchen for their verde enchiladas using their cream of chicken soup. I highly recommend this recipe for a quick, easy, scrumptious dinner! Check out the picture and just try to tell me it wouldn't be delicious (yes, I know, you can't, can you?) :) Check out this link for the recipe!

Happy cooking, crafting and reading! I'll be back soon with some book reviews!

Friday, April 1, 2011

Cupcake Pops!

Oh Bakerella, how I love your blog. I've known about it for a while and have always adored your cake pops, but I've been too scared to try them. Well, I decided that would end here and now. I attempted a challenge for my first cake pops, making cupcake pops, and using Funfetti instead of red velvet cake. I am NOT a fan of red velvet cake, ok? I just don't like it and would rather have vanilla/white/yellow cake any day. Funfetti especially makes me smile because of the sprinkles inside the cake. So I decided to use that instead of red velvet. Other than that, I used a combination of Bakerella and Cook Teen's instructions (and of course, have some tweaking for next time).

I made the cakes ahead of time, and since I lack the traditional rectangular pan, I used two 8 inch round pans instead. I crumbled the cake into a large mixing bowl, covered with aluminum foil and promptly became so busy running errands for the next few days that I barely got around to making dinner for myself before 10 pm, let alone thinking of my cupcake pops. Finally, the day James flew home from Florida, I carved out some quality time to spend with my craftstore finds--lollipop sticks in two sizes, candy melts in light cocoa and white and miniature treat bags.


 I mixed in almost the entire can of cream cheese frosting, which makes a lovely ooey, gooey mess. I recommend using a normal (read: metal) spoon and your hands (there's no real way around this...take off your rings if you don't want them covered in cakey-frosting-y mess). After this, roll the cake into little 1 inch diameter balls. I thought I did this pretty well, but mine were too small (more on that later) and pop them into the freezer for 15 minutes. My freezer isn't set up for cakepops, so I had to slide the trays in one at a time, letting one freeze while the other thaws, then switching them out.
Artsy shot!
Tray two of cake balls.


When they're nice and cold, roll them out into logs and freeze them again. Then you'll squish them into a little flower-shaped cookie cutter (Target, for this one) leaving a little muffin-top. They will look like mushrooms, not cupcakes, but don't worry, the candy coating helps a LOT. This is where I found out I'd made my cake balls too small. Combining two of them was too much, so I broke some of the logs in half, and added a half to each whole one. This seemed to make the perfect size. If you want pictures of the muffin top shape, look at Cook Teen's blog...my hands were too messy to take pictures at this point.

Next came the decorating. DO NOT use a microwave. 1. It heats the chocolate too well. 2. It WILL ruin the chocolate. 3. It solidifies too fast. DO use a double boiler. We received one as a wedding gift, but if you don't have one, do not despair, they are easy to make. Use a pot of water and a heat-safe (read: pyrex or metal) bowl. Or, set a pyrex casserole dish full of water on a burner and use another, smaller pyrex glass dish to melt the chocolate. That's James' choice. Anyways, we used out double boiler to melt the chocolate, and instead of taking it off the heat left it on the heat, since it cooled super fast. I did what Cook Teen recommended, and only took out about 5 at a time. I failed at decorating the bottoms, but James was pretty good. He hated using his hands, so he speared each cupcake through the top with a lollipop stick. It liked to slip off, so he just used it for extra support. I did dip *most* of the sticks into chocolate before spearing the cakepops and letting them dry. 15-20 minutes later, we came back and warmed up the white chocolate in the double boiler and dipped the tops in. Then, we put an M&M on top and sprinkled sprinkles over the white part. I just kinda threw them on, holding the cake pop over the sprinkles container and making a glorious mess in the process. Now, Cook Teen says you can dry these in a coffee mug. Maybe, if you use the 6 inch or longer lollipop sticks, but I thought those looked weird and used the 4 inch sticks. They do not work in coffee mugs and tea cups (our china ones at least) are too shallow and cause them to fall, so I would go with Bakerella's suggestion for her cakepops of a styrofoam brick. I did not have one, so we just set them down and I have to deal with the imperfection of flat sides. I tried using my shot glass collection, but regular sized shot glasses are too shallow and too short...AND I think the only reason mine stayed upright was because they were quake-hold-ed on. So, go get yourself a styrofoam brick. And if you figure out where they are, let me know.

Drying

In my shot glass (3 perfect ones!)


We had a serious problem. Some of the sticks popped out mid-dipping or during packaging! So we had about 9 cupcake bites with holes in the bottom (Sh, don't tell anyone!). I don't know why this happened for most, but I can hypothesize on it: some of the sticks weren't on straight. These things are heavy, so make sure the weight distribution isn't skewed or else you'll end up with cupcake bites instead of pops. Also, I think I stuck the sticks in too far on some; don't stick your stick in past the point you dipped in chocolate. Otherwise, you'll lose it. Anyways, 20 minutes after the white chocolate, we ended up packaging them: treat bags and ribbons for the pops and cupcake liners for the bites. They were a hit with James' coworkers and I was referred to as a "baking goddess" (this is the real quote, and if you want proof, look at my facebook wall!). They're a bit dense for me, and I think I might use vanilla frosting for Funfetti cake in the future, but they are pretty yummy.
The cupcake bites


Ready for distribution

Meatloaf & Mac'n'Cheese Cupcakes!

Last Thursday I attempted to make a "cute" dinner as a surprise for James. This involved some of his favourite comfort foods in cupcake form! Who knew you could make meatloaf and mac'n'cheese in cupcake form? I certainly didn't. And before anyone asks, no, it's not cake flavoured like those foods; that would be disgusting. I found the recipes here and here, respectively. I thought it would be fun since James thinks my family is weird because we like snack-y, appetizer-y foods and can make a meal of those instead of having a quote-unquote "real" meal. Anyways, I set out to find all the ingredients and make these cupcakes. I had some trouble finding chili sauce and ended up using the only one I could find--sriracha chili sauce. Beware--this is HOT. 
Sriracha meatloaf sauce
Just out of the oven


All ready!
Admittedly, mine are not as pretty as the ones that are on Sticky Gooey Creamy Chewy's blog. However, I didn't pipe on my potatoes and my oven doesn't have a broiler function, so you can forget that lovely browned look. Plus it was much messier than I had expected. They were pretty good, though James nearly burnt his tongue off. It was spicy for me too, but I enjoyed that bite. They were also enormous, and if I ever make it again, I'll probably halve the recipe. I say if because unfortunately, my stomach didn't quite agree with something in the meatloaf, be it the sauce or something else. The only meatloaf I grew up with was the singer, so I'm not too familiar with the food. The meatloaf was also difficult to eat since it was messy to eat with your fingers, too tall to really bit into (at least for me) and had a round bottom, so when assaulted with a fork, it rolled. Easy solution: cut off the bottoms before serving!

The mac'n'cheese cupcakes were pretty good. I only had one cupcake pan left, so I used one of our mini muffin pans as the second, and they turned out pretty cute. They burned a bit, which made the paper cups stick to the mac'n'cheese, which wasn't so tasty. Next time I'd figure out a way to avoid that. But all in all, they were pretty good. I still prefer my mom's macaroni and cheese, perfected with A1 sauce (my dad and I's secret macn'n'cheese weapon!) though I haven't managed to perfect the perfect cheese to noodle ratio she always manages to get. All in all, these recipes would be perfect for party food, just make them both in mini muffin pans and you've got instant comfort food appetizers that would rock for superbowl food (imo) or a movie slumber party. The novelty outweighs the cons, but I think I'll come up with my own recipes and simply transfer them to the cupcake bans for baking next time (and of course, add A1 to my mac'n'cheese)!
The cheese mixture
Out of the oven and ready to serve!
                        
Pre-cooking

Tuesday, March 22, 2011

Locro de Papas

A few years ago, one of my dad's coworkers went to Ecuador and came back raving about a soup called Locro de Papas, for which she shared this recipe from Laylita. Dad passed this recipe on to his little soup fiend and I've had it sitting in my pantry for years now. A month or so ago, I decided to try it. We could NOT find achiote powder, which is also called annatto powder, or could be made from annatto seeds and I used too few potatoes, so, keeping that in mind, I attempted it again Sunday night. It was a perfect soup night--a storm had moved in and the plastic roof over part of the house magnified the sound of the rain until it was all we could hear. With blankets on the couch and Harry Potter movies being drowned out by the rain, James ventured over the bridge to a Whole Foods to buy a tiny little packet of annatto powder. Upon his return we started peeling and cubing potatoes, dicing onions, mincing garlic and cilantro and using the KitchenAid grater/slicer attachment to grate an entire block of Monterey Jack cheese.

Onions, garlic, cumin and achiote
The coated potatoes
 As soon as we add the achiote to the onions, garlic and cumin, everything turned bright red-orange and it soon smelled like Middle Eastern food. After adding a bit more oil to keep the onions from burning, they had softened up and we added the potato cubes and made sure they were coated with the refrito or base.

After mashing
We added the SEVEN CUPS of water (make sure you have a big pot!!!) and after the potatoes softened, we used out coated potato masher to mash up the potatoes. When mom and dad made this soup, they used an immersion blender to make the soup smoother, so it all depends on what you're looking for. Ours ended up chunky, and almost like a stew once it was served. We then added the cilantro and the cheese. The recipe only calls for 1 cup, but I used the entire block (it was a small block, but still more than a cup).


When the cheese had completely melted, we served it up. I added diced avocado, hot sauce and feta cheese on top. This isn't the most flavourful soup, so salt and pepper will need to be added, but I wouldn't bother adding it until you've served it--the potatoes seem to soak it up when it's still cooking. The hot sauce adds a nice kick and the feta adds to the creaminess. The avocado is fantastic in the soup, and even if you're not the biggest fan of avocados, I'd recommend trying them with the soup. It was a fantastic, filling meal that left us plenty of leftovers that heat up beautifully. Definitely a soup we will make again and again on cold days.
The final product

Tuesday, March 15, 2011

Houseguests

Angie and Moose
We need houseguests more often. My friend Angela visited from Germany this past week, and her presence convinced me to make a menu and stick to it for the entire week! It was great; good food, leftovers that we actually used and cooking every night! We had risotto, shrimp bisque, pasties, and shepherd's pie. The dogs absolutely adored Angie; I've never seen them take to anyone as they took to her. It was amazing.

If you're daunted by risotto, DON'T BE! I promise you, it is not that hard to cook. I used this recipe from Real Simple, and it offers not only a nice, fresh, filling meal, but endless variations! James and I added chopped up chicken, but you can add any meat or vegetables you'd like, and even if it's plain it's delicious. The white wine and fresh parsley (it needs to be fresh!) make it taste fresh and light. It's a filling meal that doesn't take that long to cook. The recipe says that 1.75 C of chicken broth should absorb in 8-10 minutes, but that isn't true. It takes much longer. Just allow it to continue simmering, and stir it every now and then until it's creamy. We cook it until almost all the liquid is absorbed, but having it be a bit stew-y makes it nice and creamy, so we leave it like that. Add the pre-cooked chicken at the end with the parsley and parmesan, and top it with more parmesan before serving. So good, and so easy! Save the leftovers for lunches in a few days.

Now for the shrimp bisque. James and I have been making this bisque since coming back from our honeymoon. We went to Breeze's Grand Lido resort, and the first restaurant we went to had a delicious shrimp bisque that had a kick to it. When we got home, I wanted more, so I decided to find a recipe. Off to Real Simple again! Their website and magazine are chock-full of recipes for food that seems fancy, but is pretty easy and quick to make. Their Easy Shrimp Bisque recipe is fantastic, although I'd recommend some alterations. James and I use pre-cooked shrimp (frozen or from the seafood counter) and we only use 1/2 lb since otherwise the shrimp pieces overpower the soup. Allow the chopped and seasoned shrimp to warm up in the butter before adding the brandy (if you have a BevMo nearby, you can stock up on those little bottles, but James and I have a giant bottle that we use only for this recipe), the tomato soup and the heavy cream. I don't ever add the chives, but I do add red pepper flakes to give it just a touch of spiciness. This is a super simple recipe that only takes about 20 minutes and gives you a great cold weather soup to warm up with.

I transcribed the shepherd's pie recipe from a Good Eats episode I saw. It's the same as this recipe, but I've found that this needs plenty of alteration. We added a clove of garlic to the mashed potatoes since we both love garlic, and instead of using fresh herbs, we used dried herbs, since we had both thyme and rosemary on hand. To substitute dried herbs for fresh, simply use half the amount since the dried herbs are more potent than the fresh. Instead of lamb, which will quickly get expensive, we used ground beef, which tastes just fine. I added an extra dash or two of Worcestershire sauce since I love that taste, but the biggest change we made was in the directions. In the episode, it said to bake the shepherd's pie right in the pan used to cook the meat mixture. We decided that wasn't a great idea (read: we couldn't fit the pan we used in the oven), so we switched to an oval pyrex baking dish, which provides built in leftover storage! We did have one problem that led to another alteration: We didn't have enough potatoes to completely cover the meat mixture! We ended up having to use some microwaveable mashed potatoes to completely cover the pie. It tasted fine, but I would use at least two lbs of potatoes, if not three. Be sure to seal around the edges with the mashed potatoes to keep the meat and juices inside. We had some spill-over nonetheless, but still, this is the most delicious meal we've had in a long time. It also will provide plenty of leftovers that will heat up very well!

TO DO IN SAN DIEGO:
-San Diego Zoo: This is the best zoo in the world, and that's a fact. Plan a whole day here, since there's so much to see, and make sure that you take the Skyfari at least one way! The children's zoo section is also worth seeing, but skip the sea lion show.
-San Diego Zoo's Safari Park: Quite a ways away, but worth it, is what used to be the Wild Animal Park. It's not as touristy as the zoo, but it is fun, and definitely worth seeing. Plan on a lot of walking, a whole day, and taking the Journey into Africa tram ride (depending on your ticket, it could be an extra $10, but you see so much it's worth it).
-The Prado restaurant: In Balboa Park, which is full of museums to occupy your time, visit the Prado during happy hour, from 4-6 pm every day. Margaritas for $3.50 and plenty of discounted appetizers. I highly recommend the Kobe Beef Roll (not discounted), which is asparagus wrapped in a sushi roll, topped with a slice of raw kobe beef and wasabi cream sauce and served with a delicious dipping sauce. Split it with a friend for a good appetizer portion.
-Old Town San Diego: Incredibly touristy, but it's still fun to wander through the different shops and see what San Diego was like in the old west days.
-Seaport Village: You can't get more tourist-oriented than this, but, again, it's fun to wander around.
-Pacific Beach: Crystal Pier and a great beach to walk around on, full of surfers and sun bathers, even in winter. If you're there around lunch or dinner, stop by World Famous for delicious lobster bisque and a great view.
-Birch Aquarium: In La Jolla, it doesn't compare to Monterey, but the octopus was moving about, the cuttlefish were adorable and there was an entire exhibit on seahorses (including 1 day old seahorses!). Definitely worth seeing.

Wednesday, February 16, 2011

Cooking Forays, Baking Experiments and Upcoming Scottish Games

Whew, have I been busy! I've been finding tons of recipes I want to try, baking and planning on meeting my parents in Long Beach this Saturday for the Queen Mary Scottish Highland Games! I haven't been to a games since 2007 or so, and I really can't wait to go and have that experience again; I've missed it so much. So if you want a fun Scottish weekend in a unique locale (on a cruise ship!) come along to the Queen Mary in Long Beach, it's definitely worth it (kilts!!!!).

I have been obsessed with baking lately. I can't stop making sweets, although I definitely don't need them. I made James some vanilla bean cupcakes with vanilla bean frosting last Tuesday. I was intending to bring them to his office at lunch, so he could share them with his coworkers, but making them took a lot longer than I expected it to, and I ended up taking a bit of a nap, so I brought them to him around 4. But he enjoyed them,  I enjoyed one and he shared them with his coworkers the next day; they disappeared quickly. I used this recipe and am planning on making them again soon! I also learned that my beloved Kitchenaid mixer does have some limitations. The mixer attachment doesn't reach all the way to the bottom of the bowl, so it might not mix everything as well as you'd like. For example, I had a bunch of the early butter/sugar mixture at the bottom of the bowl, which I only discovered when filling the cupcake pan. So I stopped by Target later that night and picked up at hand mixer (for about 7 bucks!) and a set of 4 plastic mixing bowls.

Now, while I love vanilla beans, I have also looked into getting some and the ones that they carry in the spice section of the grocery are ridiculously expensive. I've seen it cost as much as 13 dollars for 2 beans, and this recipe called for 3 beans, plus I wanted to make vanilla panna cotta for Valentine's day, and that requires vanilla beans too. So I found out about vanilla bean paste, which can be used to replace vanilla beans. I looked at all three grocery stores on the island, but no one knew what I was talking about. So I decided to try Whole Foods, and lo and behold, they had vanilla bean paste! I have used about half of the paste (which is more like a syrup) and I've made plenty of things now! 1 Tbsp equals 1 vanilla bean, and the bottle was only 10 dollars, so it was a pretty good deal. I would definitely recommend it.

Next, I made some Mexican wedding cakes, which are my favourite cookie in the world. I used my mom's recipe, and was pretty excited about the results. James says they're a bit doughy, and I do agree, so if you use this recipe, I would cook it for a bit longer than the recommended 15 minutes. Still, yum! Also, rolling the hot cookies in the powdered sugar didn't work for me, but using a sifter to sift the sugar on top of the cookies worked great.

I continued with my baking forays by making a vanilla panna cotta. I followed the recipe from food network and it was pretty simple. The only difficult ingredient to find (and it was nothing compared to vanilla bean paste) was plain whole milk yogurt. You basically heat up cream, mixing in vanilla beans and sugar. While that's heating up, you sprinkle some unflavoured gelatin over whole milk (I used my lactaid) and then mix that, followed by the yogurt. You then pour the mixture into ramekins (finally got to use mine!), cover with plastic wrap and refrigerate for at least 6 hours. We still haven't eaten them, so I don't know how they turned out, but we'll probably try them tonight, and I have a good feeling about it!

The same morning I made the quinoa croquettes and cilantro-yogurt sauce again. I halved the sauce recipe, which left me with a much more reasonable amount of sauce. The croquettes were great, but I had to wait for James to help me with the frying. I had a bad experience with fish once, and don't like frying things or being responsible for cooking meat in a frying pan anymore. They're just as delicious as before.

As far as cooking goes, we made Alton Brown's chicken fried steak, with mashed potatoes and green beans. I always use the chuck steak from fresh and easy, and it works great. I also never buy it by the pound (Alton Brown recommends 2 lbs) but just enough for James and I. So I look for packages with 2-4 pieces. It's definitely worth the time it takes, and it is delicious! Serve it with some garlic mashed potatoes and you have a great home-cooked meal.

We also made a soup called locro de papas. My dad had received this recipe from a coworker who had recently traveled to Ecuador. Our soup did not turn out quite as creamy as the photo on the website, but it was still pretty good. I could not find achiote powder, which is also packaged as annatto powder, so James and I substituted it with turmeric. I'd like to try it with the achiote, but when I looked up substitutions, it said since achiote is used mostly for colour, turmeric should work similarly without much of a taste difference. I would have used more potatoes, and will the next time I make this. I am of two minds about this soup. It was not what I expected from the description my dad gave me, or from the ingredients, but it was still good. It was much milder than I would have expected, and much less creamy (hence, my desire to use more potatoes next time). Laylita's photos of the process are excellent, and ours turned out pretty much the same, but a bit more yellow (probably from the turmeric). I also think that I would have used my immersible blender to blend the soup a bit more; the onions don't mash as well as the potatoes. I used monterey jack cheese, and put in a whole half a block. I also added a lot of salt, pepper and a touch of cayenne powder at the end. What really made the soup for me though was the garnishes! I have never been much for garnishes, but the feta, avocado and hot sauce was the best. I added tons of hot sauce to my bowls of soup (James isn't a spice fiend like me) and I thought the avocado added a nice creaminess (James refused to try it). We both had the leftover soup for lunch yesterday and it was just as good, although I missed the avocado. The chives were nice, but I don't think that they really added that much to the taste. I would definitely make it again, but I'm going to put more effort into finding achiote powder, and I'm definitely going to use a LOT of potatoes!

Saturday, February 5, 2011

Pear-Gorgonzola Pizza and Leftover Gorgonzola Ideas

Our favourite pizza!
When discussing what we wanted for dinner, James said he was really feeling a craving for my pear-gorgonzola pizza. I gotta say, this is one recipe that i consider my specialty, and one of the few recipes I've come up with on my own. I forget how the idea wormed itself into my head, since I never used to be much for mixing up savory and sweet, but for some reason pear and gorgonzola baked with cheese just sounded good. Since adding marinara to that did NOT sound like a good idea, I figured out another way to make this pizza a reality.

Using a pre-cooked pizza crust (we tried making our own and it just didn't cook right), brush a light coat of olive oil on the pizza and top generously with mozzarella. Using a mandolin slicer, slice up a bosch pear (you can also use an asian pear or an apple pear, but bosch is best, I think). If you have a corer, core the pear first, but I never have, and I just pick out the seeds. Place the pear slices (which are perfectly thin) on the pizza all around, so that every bit would have a piece of pear. Use pre-crumbled gorgonzola (we had to go to two stores to find real gorgonzola) and pre-cooked bacon to top off the pizza. James and I always put more gorgonzola/less bacon on one side and more bacon/sparse gorgonzola on another (my side and his, respectively). Bake the pizza for the time and at the temperature the pizza crust packaging recommends (usually somewhere around 10-14 min at around 325). Pull out the pizza, slice up and serve! It tastes like something gourmet, but it's so, so easy to make!

Since I usually buy the pre-crumbled gorgonzola, I always end up with a bunch leftover. Since gorgonzola is not exactly cheap (not super expensive either) I don't want the cheese to get bad, so I've been trying to find other ways to use up not only gorgonzola, but other ingredients I end up with too much with. Now, my favourite pasta sauce is this delicious sauce made my Lucini, called Robust Tomato Gorgonzola Sauce. Unfortunately, it costs about 10 dollars for a normal size jar. So I decided to try to make my own. I found a recipe for it, but in my zeal to use leftovers, I decided to use the spaghetti sauce James had doctored the previous night. I had to add some canned tomato sauce since the ground beef had soaked up a bunch of the liquid, and then added in some of the gorgonzola I had left over. While it wasn't quite the same taste as the Lucini sauce, it was still pretty good. I would definitely consider doing it again, but also want to try the recipe I found. I'll let you know when I make that and how it goes. Other ideas for leftover gorgonzola:
-Put it on apple slices (works well with blue cheese too, yum)
-Put on a crostini with some honey
-Sprinkle on top of a salad, especially with a vinaigrette
-Eat with a pear
-Bake on top of garlic bread
-Mix into mashed potatoes for a rich, creamy, savoury taste

Keep tuned for some more cooking info: I'm making mexican wedding cake cookies and a surprise for James in the next few days!

Beef Empanadas and Cheesecakes

I spent yesterday baking, crafting, cooking and baking AGAIN.

Last week, James decided that he wanted to make a cheesecake. I had made him one before for his birthday, though because I lacked an electric mixer (hand-held or otherwise) I made it with a potato masher, holding the mixing bowl between my feet, sitting on the floor in front of the tv (it took forever to mix). But in the end it turned out ok, so I wanted to use the same recipe this time. I figured I could find it on the back of the Philadelphia cream-cheese package like last time. Upon getting to the store, I found that the only recipe on the box was for a spaghetti bolognese sauce. Using our smarthphones (yay smartphones) we looked up a recipe really quickly. It didn't sound like the one I'd used before, but we figured it would be just as good. So whole James was at work, I pulled out my kitchenaid (love!) and started to make the cheesecake. I got the crusts down, and mixed up the filling, poured it in and stuck the pie pans in the oven. Well, did I get a surprise. When I took out the cheesecakes they had both risen like a souffle and one had even cracked. When James got home, he tried to take the cheesecake out of the pan, which failed, then ate it from the pan itself. It did not taste like cheesecake. So we went off to the store to get cheesecake supplies and ingredients for our dinner (beef empanadas).

The beef empanadas were a recipe from real simple, and sounded pretty good. So we got the ingredients, but when we went to get the 1/2 lb beef, the prices were just ridiculous! I meant, at fresh and easy, we get beef for $1.99/lb, but it was like $6.99/lb at the store on the island. Since it was pretty much the same price, we ended up getting bison, which I love. It tastes like beef, but it's much healthier and more sustainable (as of now at least). With our ingredients in hand, we went home to make empanadas and a new-york style cheesecake. James grilled up the beef, and we used a half of an onion that we'd previously chopped up. In fact, the only thing we didn't have at home were the refrigerated pie crusts and the golden raisins. If you're gonna make this, take out the pie crusts about a half hour before! They need to thaw (or else they will tear!)!!! Despite James' hesitation about raisins, beef and ketchup together, the empanadas turned out really well. Instead of a cookie cutter (since I don't have a round one) I used a drinking glass, which had a diameter of over 3 inches. It still seemed small. We could put about a tablespoon of the beef mixture in. Make sure you press the edges of the crust together really well, or else they'll come apart while you're baking them and they'll look like weird little tacos. Anyways, we didn't use sour cream, but they were delicious. James liked them so much he took the leftovers to work for lunch the next day!
mmm yummy

Then the second cheesecake attempt. We used this recipe and it turned out great. The cheesecake rose a bit, but didn't crack, and it ended up tasting great. We did make a few changes, and there are a few things I'd like to change the next time. We lined the pie pan with aluminum foil, leaving enough foil along the outside to use as handles to make pulling the cheesecake out easier. I'd recommend cutting the crust recipe in thirds, since we only used about 2/3 of the crumbs and the rest went into another pie pan that we didn't have enough filling for.  Baking the crusts for 10 minutes before really helped a lot since it made the crust nice and crispy. One thing I had learned is to put the cream cheese in the mixer first, beat it for a while, then add in the sugar and the eggs as the mixer was on low. With these proportions, the filling is nice and liquid-like, easy to pour into the crust. The sour cream topping was super easy, just pour it on the top of the cheesecake and bake for another 10 minutes. The foil worked magnificently, and we transferred the cheesecake to a plate in the fridge, where we left it overnight. The next day James cut the cheesecake into 8 pieces (the recipe says 16) and we had it for dessert. It was delicious! It tasted so good! Maybe a bit heavy on the sour cream, but as long as the bite had everything- topping, filling, crust- it tasted great. And it looked a lot better than the previous cheesecakes had. Just be careful when you're cracking eggs, since I lost a bit of the shell in the mix and had to find it the hard way---yuck, but it still tasted delicious!

Friday, February 4, 2011

Quinoa croquettes, cilantro yogurt sauce and brie soup

An influx of blogs all of a sudden! I'm actually catching up! Yay!

A few weeks ago I went on a big craft binge, bookmarking hundreds of sites for future use and in Etsy's blog, I found a recipe for quinoa croquettes and cilantro-yogurt sauce. I'd never heard of quinoa (pronounced "keen-wah") which is a grain that is very good for getting protein. The night before I made it, I had the most bizarre dream about trying to find quinoa the night before, involving me going to a little town market (Boney's Bayside here in Coronado) which told me they didn't have it, then trying to find a Whole Foods that carried it. The dream was so realistic I almost gave up before I started. Boney's Bayside did have it, and I didn't even have to wash it as it was pre-washed. I bought the scallions (same thing as green onions, in case anyone else is confused), a zucchini (which is the same as a zucchini squash), pre-shredded carrots and parsley. I did NOT use grapeseed oil, but normal canola oil. For the sauce I bought cilantro, an onion, plain yogurt and since I couldn't find ume plum vinegar (available at whole foods) I used normal rice wine vinegar. 

This recipe makes A LOT of sauce!

What the sauce looks like when finished
I made the sauce first, which was pretty simple. Using my combination blender/food processor I put the cilantro, soy sauce, vinegar and cubed onion into the food processor and blended until it was smooth. I then added the yogurt and the olive oil and blended again. Depending on the size of your food processor, I recommend using a blender. My food processor wasn't quite large enough and the sauce ended up leaking from the top when it was blending, so I had a bit of clean up already. I moved the sauce to a tupperware and stuck it in the fridge until dinner was done. 

Pre-cooked patties
I then began on the croquettes. The boiled quinoa looked a bit like couscous or a risotto when it was cooked. You combine 1 cup with quinoa with 2 cups of water, bring it to a boil then simmer, covered, until the water is completely absorbed. After allowing the quinoa to cool a bit, mix the julienned carrot and zucchini, garlic powder, salt, parsley, egg and flour. When it's well mixed, form then into little patties about the size of a crab cake. 

After frying
Add enough oil in a large skillet to cover the bottom. Heat it up and you can get your husband to fry the quinoas in batches until they're browned on each side. The recipe said this should take 3-4 minutes, but James and I found it took more like 6-7 minutes a side. Just keep an eye on them, and let them get crispy. Add additional oil as needed, and when you're done, you'll end up with a dozen or so croquettes that look like this: Place them on a paper towel (or a paper bag according to the recipe) to absorb some of the oil and serve them with the cilantro-yogurt sauce. Absolutely delicious. I had one cold the next day for a snack, and finished the last few for a light lunch the next day, and they were just as good as they were fresh. Just reheat them in a toaster oven is possible. If you use the recipe for the sauce, you will have a TON of sauce left over. It would be great as a salad dressing or a drip for veggies or plain potato chips.

Brie Soup mmmm
I also served a brie soup as a side for this dinner. I found the recipe on MuggleNet (yes I am a bit obsessed with Harry Potter--when will they be released as e-books??) and decided that since I love brie and soup I would love brie soup. I made sure I had all the ingredients: butter, onion, celery, flour, chicken stock (or broth), brie cheese, and half-and-half. After dicing the onions and celery, sautee them in the butter until the onions become translucent. Whisk in the flour and allow it to cook/heat for 3 minutes (it may seem like it's burning, so keep stirring it) and then gradually whisk in the chicken broth. I cannot stress how important it is to keep stirring and do this gradually--it helps prevent lumps. Let the soup tender for about 15 minutes (until the celery is tender) and then stir in the brie cheese cubes and give it time to melt a bit. 12 oz (.75 lb) but I only used .6 lb of brie (the largest I could find) and it tasted quite brie-ish enough. Now, mugglenet tells you to use a blender for the soup, but having had some experience with hot liquids in blenders, I decided that I would use an immersion blender. The cheese is kinda hard to clean off, but, as we discovered while washing it, my immersion blender has a detachable blending attachment, so that will make it easy for the next time. Use the immersion blender until the soup is smooth and then stir in the half-and-half, season with salt and pepper and serve warm with a baguette. (There is a recipe for the baguette, but I just used a store bought one...I'd had enough cooking.)
It's a good soup, but it is very rich. And it makes enough for like 3 or 4 people to eat. James didn't care for the taste (he doesn't like brie) so we had a bunch left over. I think that if you mixed it in with mashed potatoes it would taste really good, but I haven't done this yet, so it's all in theory. It wasn't fantastic with the croquettes, but it would be really nice on a stormy night...if you like brie.